A Guide to Scattering a Document All Over Your Desk, But Not Really
The title will make a non-zero amount of sense soon, don’t worry.
To illustrate the README.md of my Markdeep-based thesis typesetting tool, I was looking for a way of showcasing some example pages of my Master’s thesis – the principal reason for the tool’s existence – in a visually appealing manner. The goal was to showcase the cover page, the table of contents, and similar “highlights” while visually communicating that yes, this tool was indeed suitable and battle-tested for large documents.
In my mind, a basic grid of thumbnails wouldn’t cut it since most pages aren’t very unique from a layout point of view. Neither would a few larger thumbnails of select pages as barely any of the pages are interesting from a content point of view. I settled on generating a “scatter plot” with most pages in the background, partially obscured, and some interesting ones out in front:
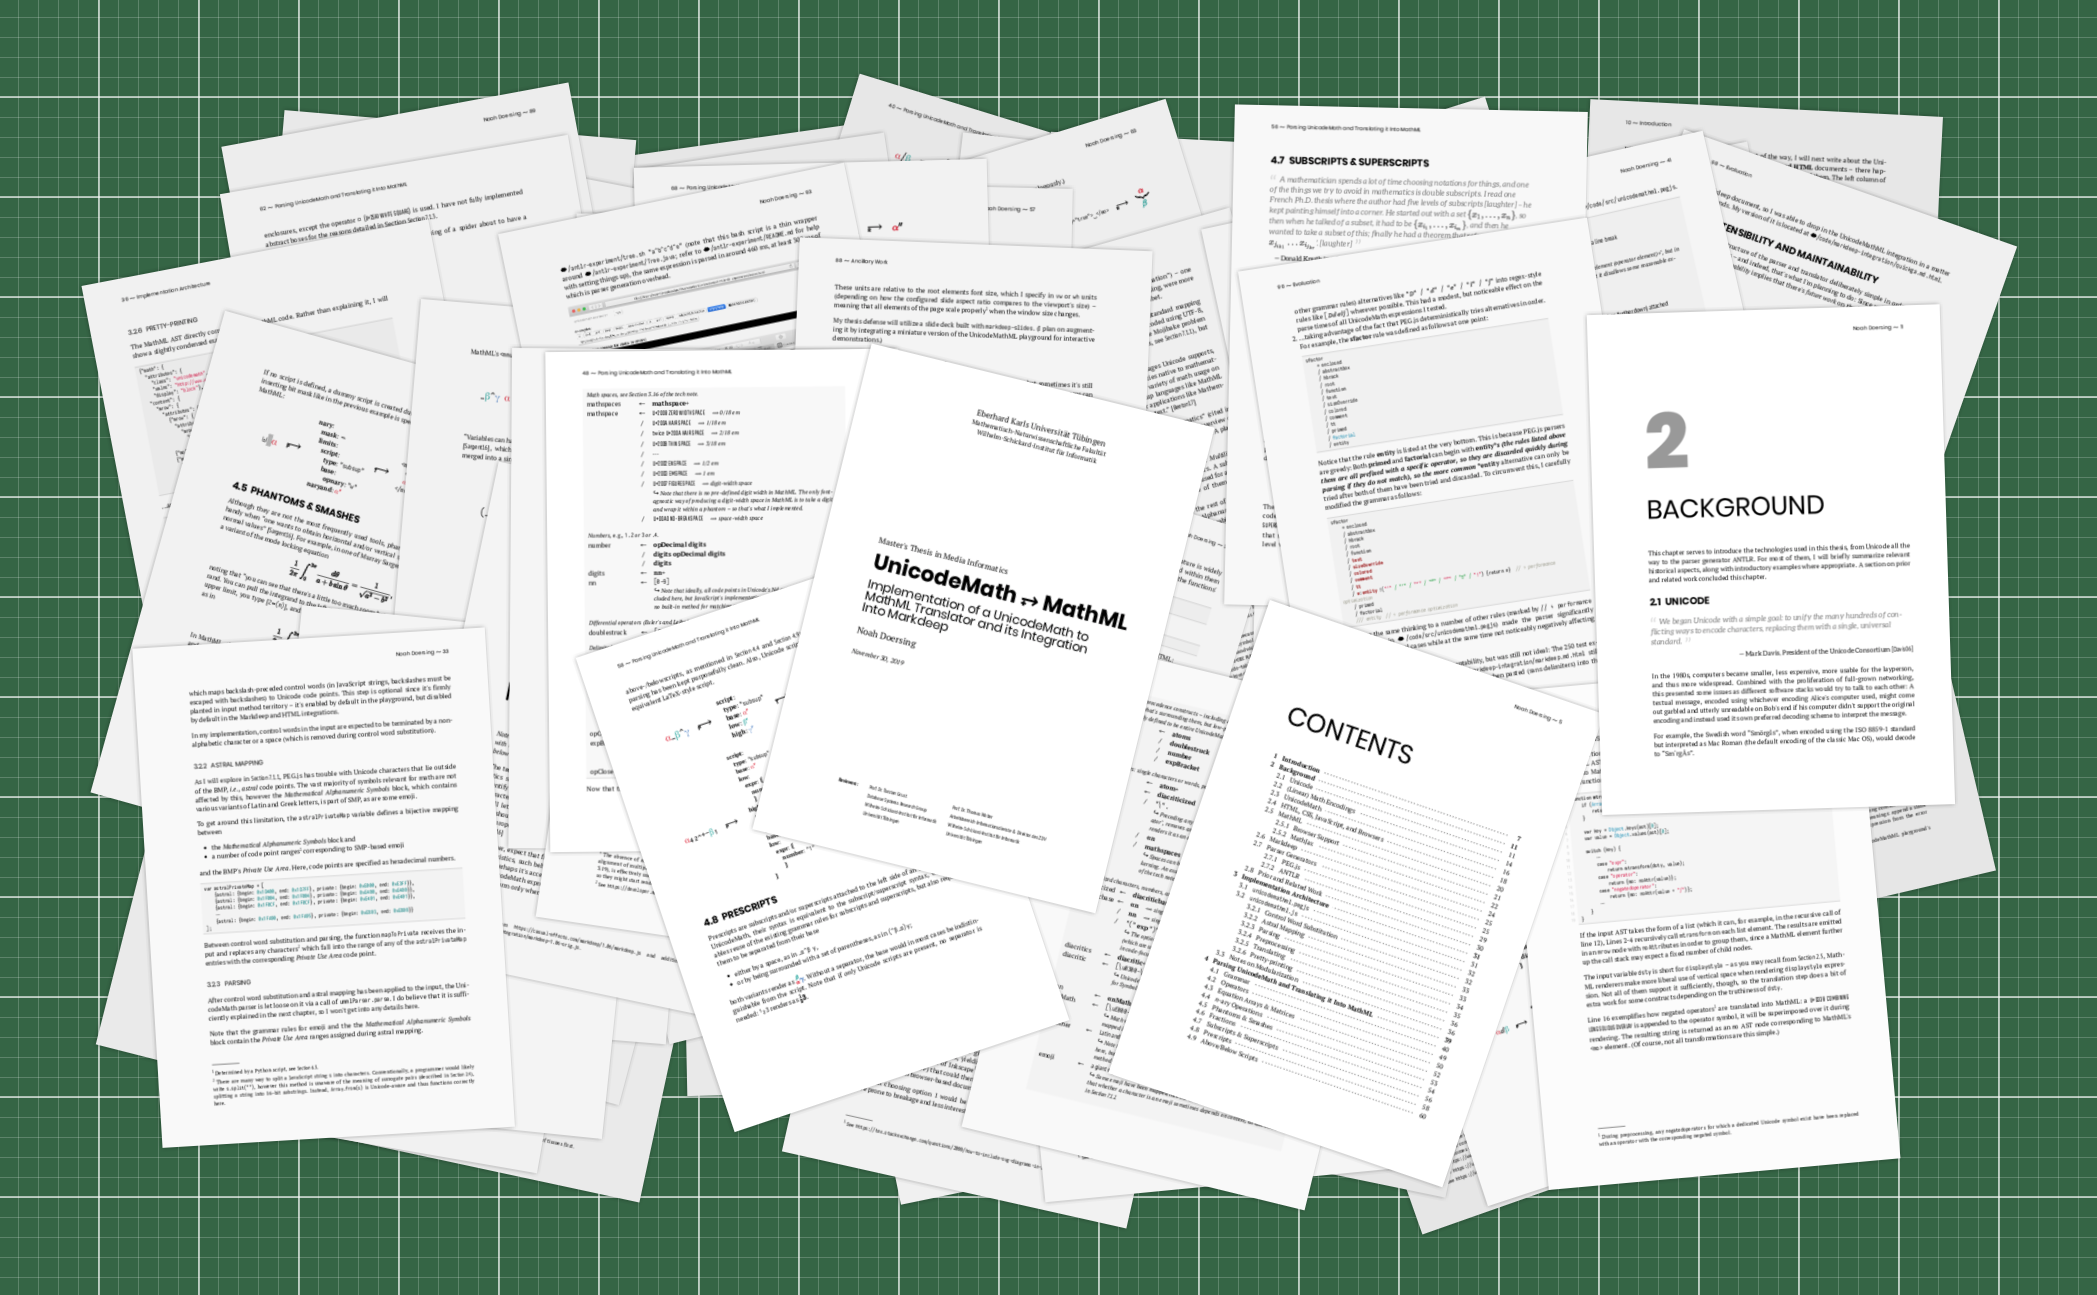
The rest of this article walks you through the workflow I came up with to generate this image.
Converting a PDF to a series of images
Starting out with a PDF document thesis.pdf, the first step involved figuring out how to render its pages to more versatile (or at least malleable) image files. It turns out that the venerable ImageMagick – which I like to imagine as a rusty and disorganized but bottomless toolbox – is up to the task.
I knew that it supports indexing to access specific pages of a PDF, so I wrote this Bash loop:
for i in {0..106}; do
    convert \
      "thesis.pdf"[$i] \
      -thumbnail x500 \
      "thesis-page-$i.png"
done
You can ignore any warnings related to color profiles – they don’t seem to affect the end result.
The -thumbnail x500 bit resizes each page to a height of 500 pixels, which seemed sufficient for my purposes here. According to the documentation, the -thumbnail flag has a speed advantage over the more commonly used -resize option.
Later, I realized that the loop wasn’t actually necessary, although it helps with keeping track of the progress – even with the -verbose flag, the following ImageMagick invocation takes a lot of silent thinking time (despite being faster in the end, and not requiring you to look up the page count):
convert "thesis.pdf" -thumbnail x500 "thesis-page-%03d.png"
Great! Thinking about how best to arrange the images, my mind quickly went to building a throw-away website – using JavaScript-generated CSS transforms for the scattering effect seemed like a low-fuss way of getting the job done.
But first, I needed to generate a bunch of <img> tags referencing the pages/images.
Generating an HTML file
To generate the <img> tags, I initially copied the output of ls -1 (which forces a single column of filenames only, without any metadata) into Sublime Text and used its multi-cursor capabilities to wrap each filename in a tag. But you don’t need any of that, good old’ sed and a basic regular expression will do the trick:
ls -1 | grep "thesis-page-" | sed 's/^\(.*\)$/<img src="\1">/' > scattered.html
If you now open scattered.html in the browser of your choice, you’ll be presented with a grid view of your pages – if that’s what you’re after, you can stop here (although you might wish to visually set the individual pages apart using borders and margins).
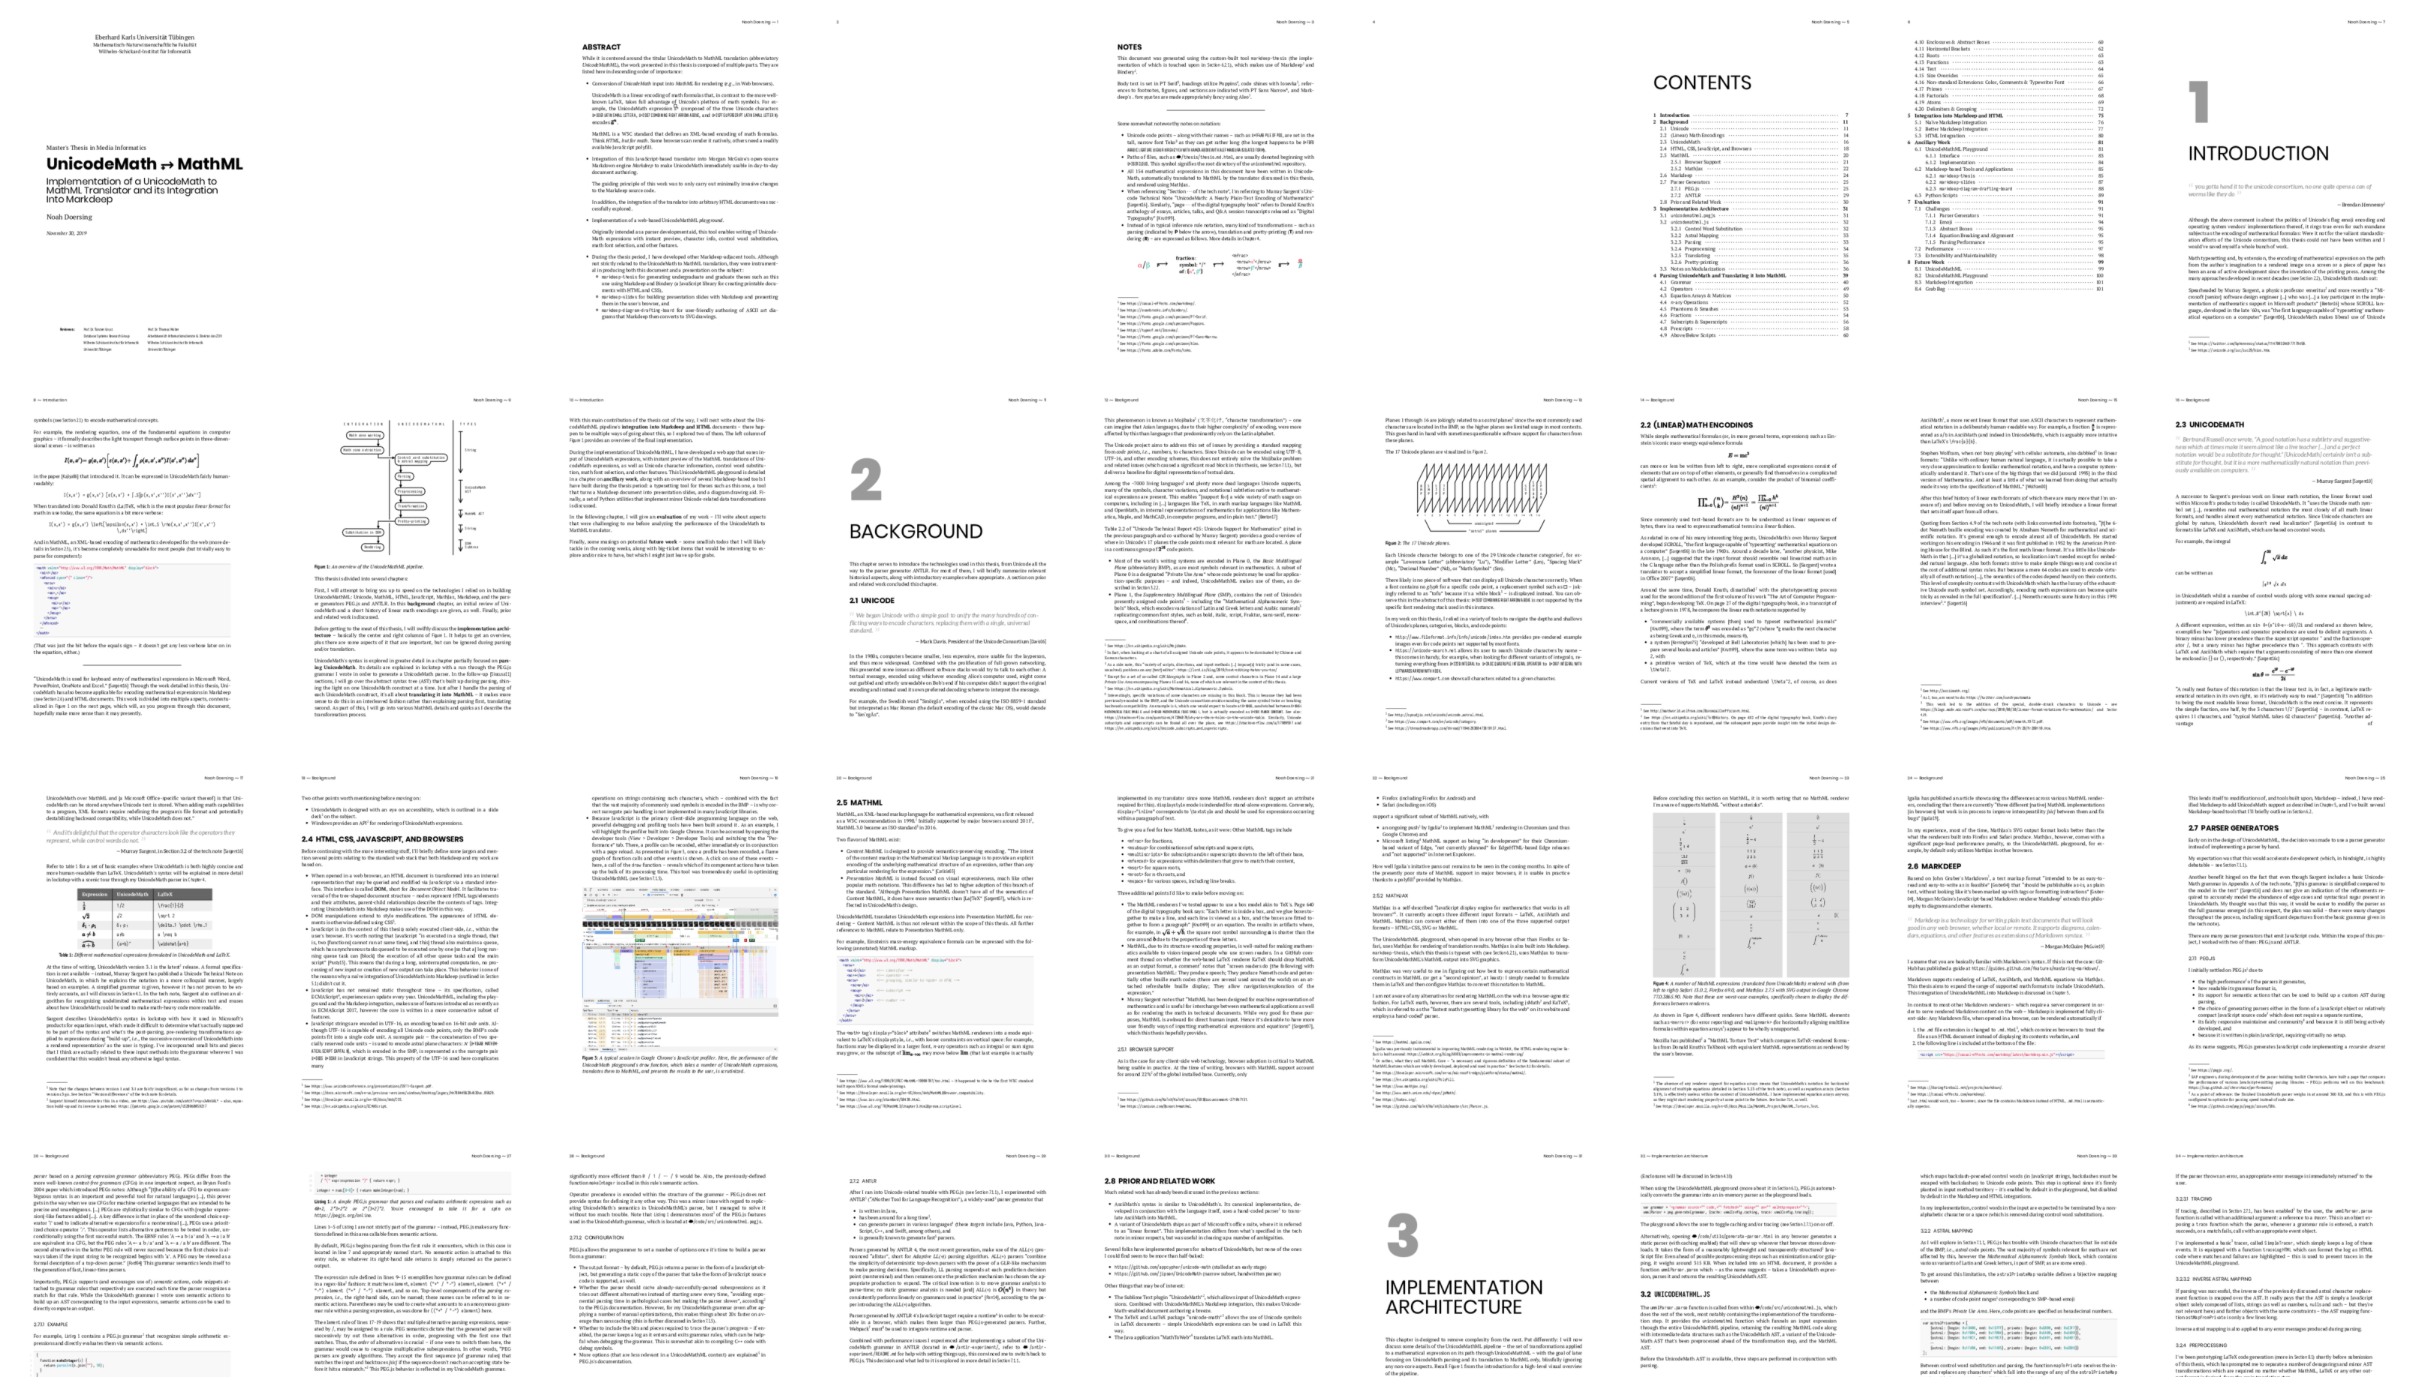
This is actually a semi-useful contact print of your PDF.
Scattering the pages with CSS and JavaScript
To transform scatter.html into something resembling the picture at the top of the article, a bit of general styling is required.
<style>
    body {
        margin: 100px;
        background-color: #eee;
    }
    img {
        display: inline-block;
        position: absolute;
        background-color: white;
        box-shadow: 0 0 5px #0005;
    }
</style>
What’s going on here?
- The
body’smarginmore than accounts for the additional space taken up by the pages once they’re rotated slightly. Its light graybackground-colorinduces a modicum of contrast against the white background of the pages. - The
displayandpositionproperties set for all<img>tags are required for the positioning and rotation work that’s coming up after this list. - Since PDF pages can have transparent backgrounds, a neutral
background-colormakes sure everything’s opaque (notably, PDFs created using Chrome’s built-in print functionality feature transparent margins). - Finally, the
box-shadow: 0 0 5px #0005;part gives the images/pages a bit of a drop shadow. Even if you’re familiar with CSS colors, the notation#0005might strike you as slightly unusual – it means#000(red, green, and blue each set to zero, i.e., black) with5fifteenths (so, a third) of opacity. A semi-transparent gray, then.
This general styling must now be supplemented with more specific styling for each image where its position, rotation, and z-index is set. The integer-valued z-index property determines the drawing order – elements with larger values will show up in front. We’ll be setting it randomly to disable the browser’s default behavior where elements defined later (i.e., the last few pages) render in front.
All this is accomplished the easiest with a bit of JavaScript:
<script>
    document.querySelectorAll("img").forEach(e => {
        const x = 1500 * Math.random();
        const y = 600 * Math.random();
        const angle = 20 * (Math.random() * 2 - 1);
        const z = parseInt(Math.random() * 100);

        const style = `
            transform: translate(${x}px, ${y}px)
                       rotate(${angle}deg);
            z-index: ${z};
        `;
        e.setAttribute("style", style);
    });
</script>
Nothing too fancy going on here – for each image, a random position, angle, and z-index is generated and applied through a style attribute. (Depending on how many pages your PDF has, you might wish to adjust the constants.)
Assuming these two snippets are located in a file prettify.html, you can add them to scattered.html as follows:
cat "prettify.html" >> "scattered.html"
(The >> operator appends to the target instead of overwriting it.)
Open scattered.html in your browser again. Things should look a bit more exciting now! You might need to scale down the page (via ⌘- or ctrl- depending on your OS) to get everything visible at once, then keep refreshing until you get a pleasing arrangement.

Once you’re satisfied, take a screenshot and chop off your browser’s window chrome in any image editor.
But wait, there’s more!
Prioritizing pages and visual tweaks
In my use case, there were a few pages – the title page, the table of contents, the start of a chapter – that needed to be shown at the top of the pile. On an infinite time scale, refreshing a bunch of times will eventually come up with a configuration matching these requirements. Since I didn’t have infinite time available on this occasion, I implemented a way of prioritizing specific pages by adding a z="1000" (or any other number) attribute to the corresponding <img> tags.
(When editing scattered.html to add these z attributes, note that any number larger than 100 will push the page to the top since the JavaScript snippet generates values between 0 and 100 for all pages without an explicit z attribute.)
At the same time, I thought that fading pages towards gray the further in the back they are located might add some visual interest. To this end, I came up with the absolutely-not-based-on-any-solid-theory formula
To incorporate these changes, replace the JavaScript snippet above with this upgraded variant:
<script>
    document.querySelectorAll("img").forEach(e => {
        const x = 1500 * Math.random();
        const y = 600 * Math.random();
        const angle = 20 * (Math.random() * 2 - 1);

        let z = parseInt(Math.random() * 100);
        if (e.getAttribute("z")) {
            z = parseInt(e.getAttribute("z"));
        }

        const brightness = 100 - Math.sqrt(100 - Math.min(100, z));

        const style = `
            transform: translate(${x}px, ${y}px)
                       rotate(${angle}deg);
            z-index: ${z};
            filter: brightness(${brightness}%)
        `;
        e.setAttribute("style", style);
    });
</script>
Finally, a light gray background didn’t seem like the most interesting thing to be looking at, so I experimented with linear-gradients to draw a pattern that’s akin to a cutting mat. Despite ending up sticking with gray for my README.md illustration purposes, I felt like sharing the fancier variant. As with the previous snippets, you can just append this one to scattered.html:
<div class="bg"></div>
<style>
    .bg {
        position: absolute;
        width: 2500px;
        height: 2000px;
        top: 0;
        left: 0;
        z-index: -1;
        background:
            linear-gradient(0deg, #fff9 2px, #0000 2px),
            linear-gradient(90deg, #fff9 2px, #0000 2px),
            linear-gradient(0deg, #fff3 1px, #0000 1px),
            linear-gradient(90deg, #fff3 1px, #0000 1px),
            #364;
        background-size:
            100px 100px,
            100px 100px,
            20px 20px,
            20px 20px;
        background-position:
            -2px -2px;
    }
</style>
Upon refreshing scattered.html in your browser, you should now see something along the lines of the image shown in the introduction. As before, keep refreshing until the gods of RNG bless you with a nice-looking arrangement.